
By Martin Jansen, Owner of Jansen-PCINFO
The first snow here in Northeast Wisconsin, was about 3 inches, wet and heavy. Time to try the big Toro Snow Blower, serious power capable of throwing light snow 40 feet or more – if it would only start. It didn’t – even though I had the Toro serviced late last year. I was frustrated.
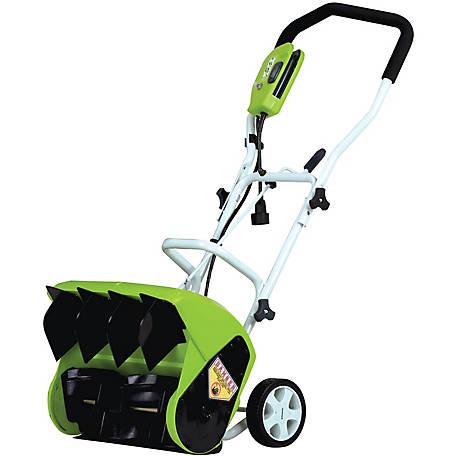
Last year, I purchased a Greenworks electric snow thrower at a deep discount. This had wheels and fins to direct the snow. I thought, no way would this work to clear this heavy snow. The terrible alternative was to shovel with back breaking labor.
So I tried the Greenworks and, amazingly, it did the job. Sure it jammed up once or twice with slushy snow, especially at the end of the driveway, but it cleared easily with just a shake of the thrower. NOTE: NEVER PUT YOUR HAND IN A CLOGGED SNOW BLOWER. I have to admit, however, working with long electrical cords in cold weather is a real pain.
This got me to thinking, what about a battery powered snow blower? No more gas and oil to worry about, just insert a full lithium ion battery and get to work.
My research showed a variety of models and prices. The Ego Single Stage Snow Blower comes in at $750 with two batteries and charger. Too expensive. Since I had good luck with the Greenworks I researched their models. Greenworks has a Pro line with 80 volt batteries and a middle line with 40 volt batteries. I chose the 40 volt line because the batteries could be used in other tools, like my slowly dying string trimmer.
Menard’s, my favorite store, had a 40V 16″ Brushless Single-Stage Snow Blower w/ 4.0Ah Battery & Charger for $250. A good deal since the Greenworks website had it at $300.
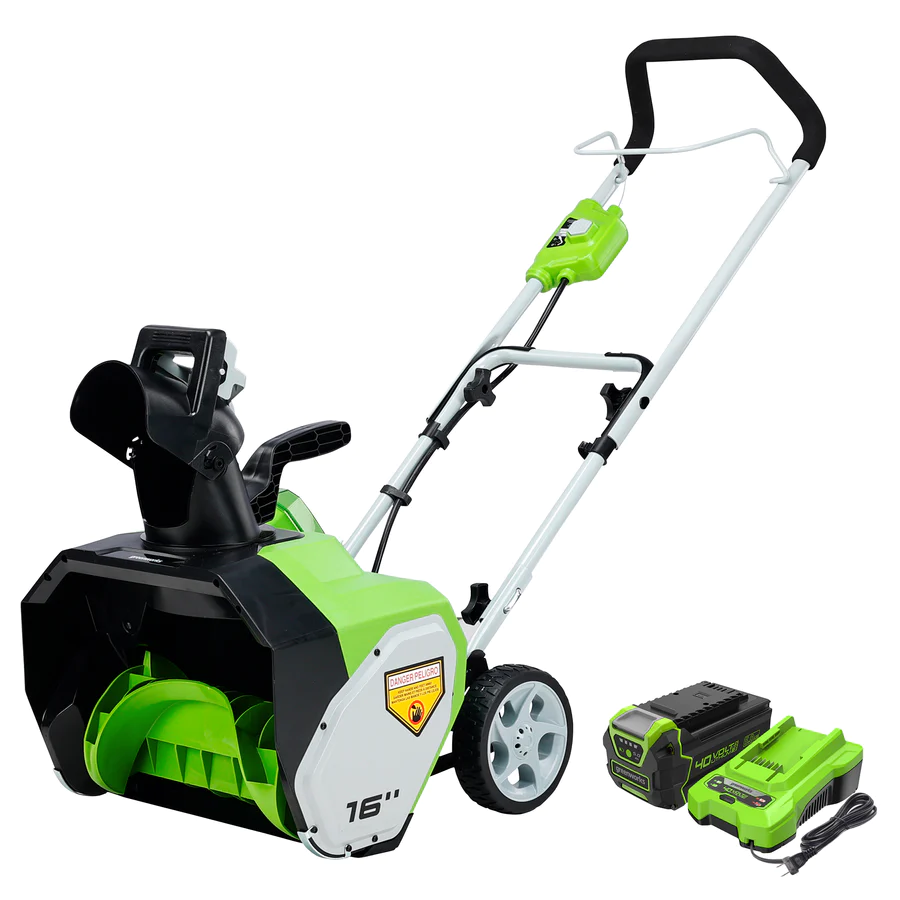
I know what you’re thinking. How could this little thing do anything with snow? I read many reviews with some calling the machine “a beast.” It clears snow easily with its small chute, even the end of the driveway after the plows have come through. It finished my driveway without a problem on the single supplied battery. Eventually, however, I knew I would need a second battery.
Second Battery Search
Of course, Greenworks sells batteries for their tools. It’s a money maker. Another 40 volt 4.0Ah battery is $150 on Greenworks website. That’s right, one battery could cost 60 percent of my original snow blower plus battery and charger. Ridiculous!
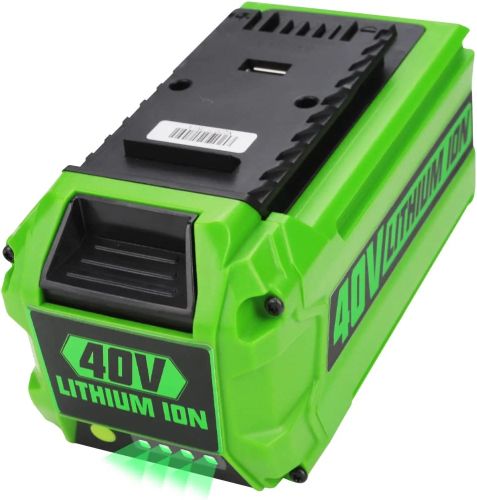
Fortunately many aftermarket batteries are available on Amazon, some are 6.0Ah. This would give me additional run time on the snow blower. After reading many reviews, I went with the ANTRobut 6.0Ah Replacement Greenworks 40V Battery. The battery cost $65, less than half the cost of Greenworks original with 30 percent more run time. It also has a bonus 5 volt 2.5Ah port for charging cell phones and the like. See the image at the top of this article.
Charging Time
The new replacement battery arrived a few days later and I immediately put it on the charger. A few hours later it was fully charged, just in time for another round of snow.
The new battery worked extremely well handling the light snow and heavier end of drive snow without a problem. Best of all, it only had one bar of charge down after the job was complete.
Lithium Ion batteries are a bit different from the old nickel metal hydride (NiMH) type. Once fully charged, it can be removed from the charger. LiOn batteries retain power over months when not in use.
One thing though, the battery was extremely hard to remove from the blower. Greenworks batteries have a partially rubberized surface that allows for easier removal. In reviews, others have also complained about battery removal as well.
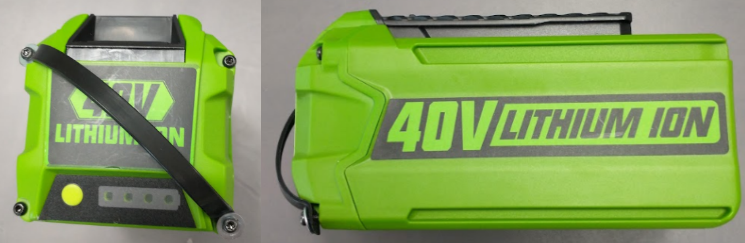
The Hack
So what is an enterprising man to do about the battery removal problem? He creates a strapping solution that is easy to implement. I took a wider 8 inch cable tie and cut off both ends to create the strap. Then I drilled a hole in one end. I removed the lower Torx screw from the front of the battery. I inserted the screw through the cable tie hole and used a small washer to reinforce the future strap.
I put the strap on a diagonal to the top screw, attaching it the same way as the lower. You don’t want to use too much strap because it could push up the battery cover. Just enough to get a finger under the strap to remove the battery. Trim off the ends and file them down to prevent sharp edges.
I didn’t worry about removing a few screws and reattaching them – pretty non-invasive surgery.
A couple of pictures is representative of a thousand words: here is the completed strap:
I am ready for more snow. Bring it on!