
By Martin Jansen, Owner of Jansen-PCINFO
If you have a home, you probably have a tank water heater. Inside that tank heater is an anode rod that attracts impurity in the water. It is a sacrificial rod that avoids galvanic corrosion in the tank. Without the anode rod, the corrosion would attack the lining in the tank greatly shortening the life of the water heater. It may surprise you to learn that anode rods should be replaced every 3 to 5 years depending on your water type. For a more detailed explanation click on this link.
If your water has a rotten egg smell, it could mean that your anode rod needs changing.
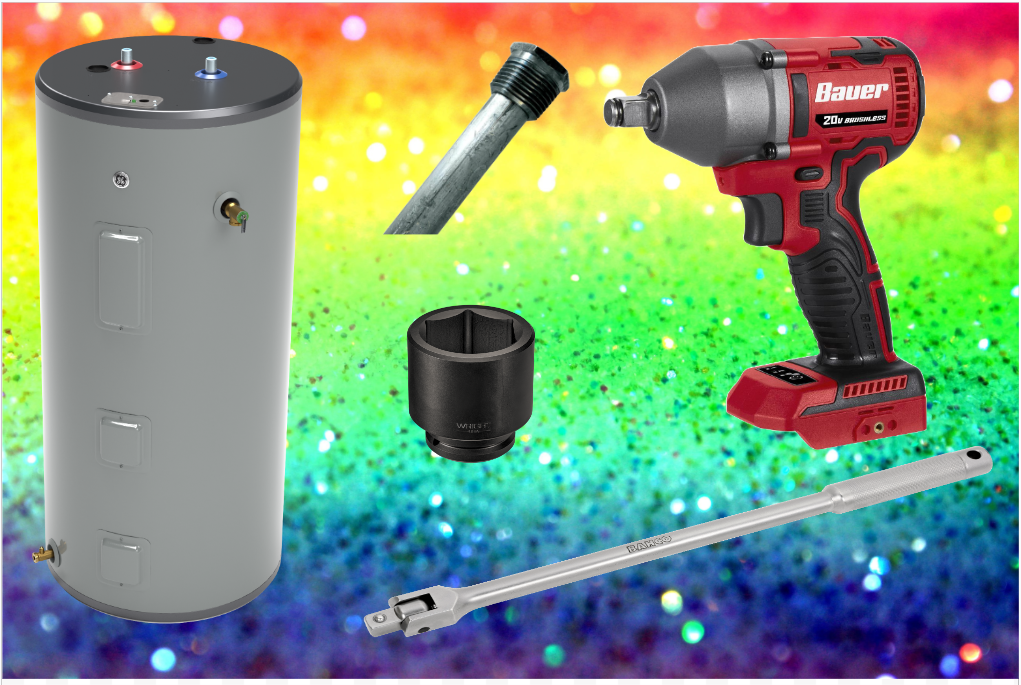
It was time to change mine and I thought it would be easy. I watched a few YouTube videos, and found that I needed a 1 1/16 inch socket which I purchased at Menards. I also bought the aluminum anode rod at Menards. I was warned against using 12 point sockets in favor of 6 sided impact sockets in case the anode rod was fastened on tight.
At first I tried it myself. I brought out my 1/2″ Drive 24″ Breaker Bar which I attached to the socket. I turned off the water to the tank and released pressure by partially draining the tank. My first try at the anode rod proved it was on tight, I could not break the threaded seal. All I was doing was turning the tank.
I have a natural gas water heater with flexible connections to the tank for gas and water input/output lines. I didn’t want to turn the tank too much at the risk of breaking the lines.
Next I called my son over to assist with holding the tank in place. I added a three foot length of “cheater” pipe to the breaker bar and tried again. Even with the greater force the seal could not be broken. We switched places, me holding the tank and him trying the bar. Same thing, all we could do was move the tank, not break the seal.
A few days later, my job was to secure the tank so it would not move. This involved straps and hooks securing the tank to the surrounding walls. We tried again and still the seal could not be broken.
Now I was frustrated and thinking that I would just have to live with a corroded rod and tank.
I turned back to the internet and found an obscure article about using an impact wrench instead of a breaker bar to remove the old anode rod.
My son had a Milwaukee 12V ¼ inch Impact Wrench that we tried with an adapter, but it wasn’t enough.
Time for heavier artillery on a budget. I didn’t want to spend a whole lot of money so I turned to Harbor Freight and found a BAUER 20V Cordless 1/2 in. Compact Impact Wrench for around $50. I already had one of their 3 Amp Hour batteries.
I hoped it had enough turning power to remove the old anode rod.
As soon as I returned from Harbor Freight and assembled the impact wrench my son and I went down for one last try at the anode rod. Here is a picture of the assembled wrench with battery and socket:
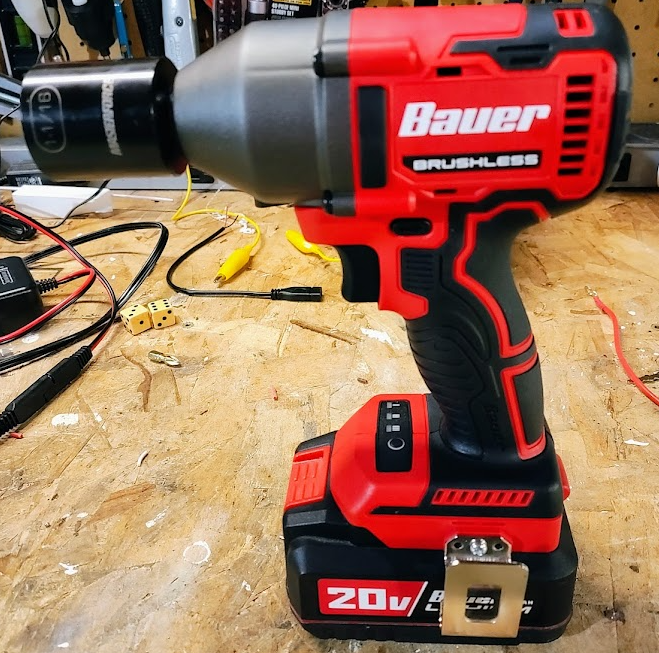
Apologies for the slightly messy work bench.
Once again I turned off the water to the water heater and released pressure. I turned the wrench to its third setting with the most torque. Carefully put the socket on the anode rod top and pressed the switch on the impact wrench.
Success! The anode rod started turning after about 20 seconds of impact. I was able to use a ½ inch ratchet wrench to completely remove the stubborn anode rod. Because the rod is 42 inches long (for a 40 to 50 gallon tank), my son and I used a clamp to make sure the corroded rod didn’t break into the tank. This guy is holding a corroded rod:
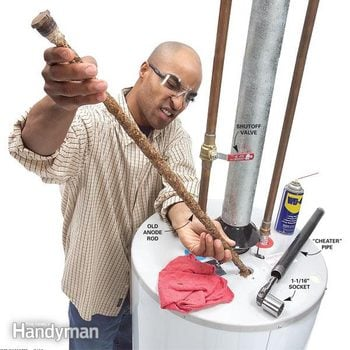
Ugh! It’s gross.
I used teflon tape on the threads of the new anode rod and inserted it in the tank. I tightened it using the ½ inch ratchet wrench and returned water and pressure to the tank. We turned on the faucets around the house to let the air out and return normal water pressure. No leaks and I was able to clean up after the project.
I finally found the right tool to do the job with my water heater tank anode rod. Hopefully your replacement will be easier than mine.