

By Martin Jansen, Owner of Jansen-PCINFO
Did you ever find something on Youtube or from another website that was so good that you wanted to record it? I did and then researched how to get the video downloaded and then extracted to an MP3 file for later listening. In order to do this I downloaded and installed three cross platform tools (click on each for a link to websites):
The great news is that each of these tools are open source and free.
As you know, Youtube has the biggest repository of videos available on the internet. Youtube-dl is capable of downloading many of the videos to a computer for viewing. Warning: some videos may be subject to Digital Rights Management and will not be downloadable. That aside, in Linux, youtube-dl runs from the command line. From your Videos directory open a command prompt or terminal and type in youtube-dl with a space and then the URL from the Youtube video as in this screenshot:
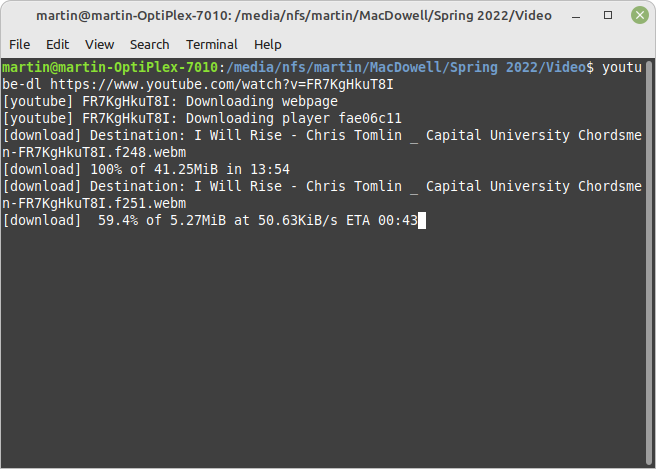
The video may be downloaded as a .webm, .mp4 or .mkv file. It makes no difference to VLC for the tool can play and convert them all.
Once the video is downloaded, I use the file manager to rename the file to one with less characters. Now it is time to extract the audio to an .MP3 file – VLC can convert the video file as in this screenshot:
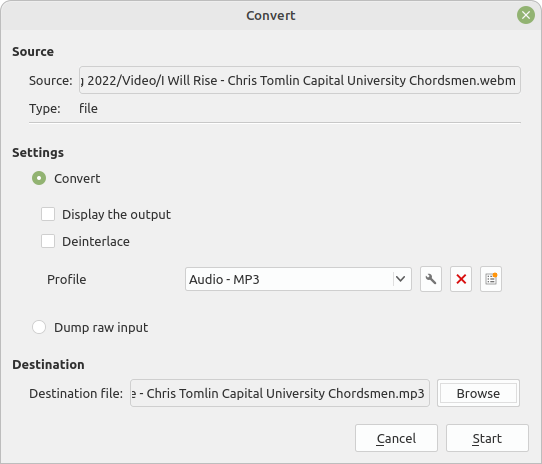
It is easiest to use the same Video directory to convert the file, changing the extension from .webm to .mp3. Click on Start and the audio is extracted quickly. Use the file manager to cut and paste the new .mp3 file to the folder of choice. Play it in VLC and enjoy.
Recording Audio from the Sound System with Audacity
Sometimes websites do not offer the possibility of downloading content. Instead, Audacity can record audio that would normally be played from the sound system of the computer. In Linux this is accomplished by installing PulseAudio Volume Control and following these steps:
1) Open Terminal and install PulseAudio Volume Control by issuing the following command:
sudo apt-get install pavucontrol
2) Launch the PulseAudio Volume Control program by typing “pavucontrol” (without quotes) in Terminal and hitting ENTER.
3) In PulseAudio Volume Control, click on the “Input Devices” tab
4) Make sure to mute or disconnect all unwanted sources of sound input. For instance, I disconnected a USB headset and USB Webcam prior to starting the process.
5) Click on the “Show” radio button and change the setting from “All Except Monitors” to “Monitors”
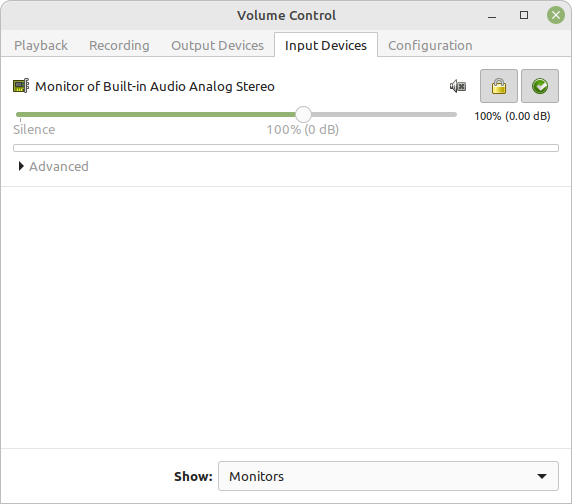
6) Play the music file in VLC, and make sure one of the Monitors in Volume Control (in my case, it was called “Monitor of Built-in Audio Analog Stereo”) is picking up the sound
7) For the Monitor that is picking up your sound, click on the green check button to “Set as fallback”
8 ) Launch Audacity, set recording to pulse and stereo, and then record as you play the audio or video – then export as an .MP3 file. I suggest saving the project as well for later editing should the .MP3 be not as expected.
In Windows, the process is a bit different, instead of pulse, set the recording source to Windows WASAPI. EaseUS has a nice guide to doing this, not only with Audacity, but with OBS and other software as well: https://www.easeus.com/screen-recording-resource/audacity-record-computer-audio-on-windows-10.html
Recording video and audio is possible from websites that you enjoy. Save those files for playback whenever needed.